
It’s the easiest way to learn how to take great photos faster… You’ve bought your new camera you’ve sussed out how it works and now you’re ready to experiment with some of the camera modes, but what are those letters on the camera dial and what would you use them for? I know it’s something I definitely struggled with when starting out, so I thought it may be helpful for you if I run through the advanced modes below including what situations you may use them and some of the potential issues when using camera modes.
Camera Modes: What do the letters mean?
Aperture-Priority (A) or (Av) – You control the blur (my favourite recreational mode)
This is my favourite mode when I’m heading out with the family for the day. It’s perfect for general portraits and landscapes giving you control over how much of your photos you want in focus… So if you’re photographing people you generally would like a large aperture (low f-stop number – f/2.8 and below) to give you that expensive looking creamy blur behind your subject. If you are photographing landscapes you can select a small aperture (larger f-stop number f/8 and above) to have more of your scene in focus.
*Potential ‘Aperture’ priority issues
This mode can become less effective in lower light sometimes… especially if you don’t have a lens that can go to a large aperture… for example if you take your kids to the aquarium which is dim lighting once the lens has reached its max aperture it will start to slow down the shutter speed automatically which means you may start to get motion blur in your photos. Some cameras will let you change the ISO manually to account for this, but if not I find that it’s harder to get your shots the way you want them in these scenarios.
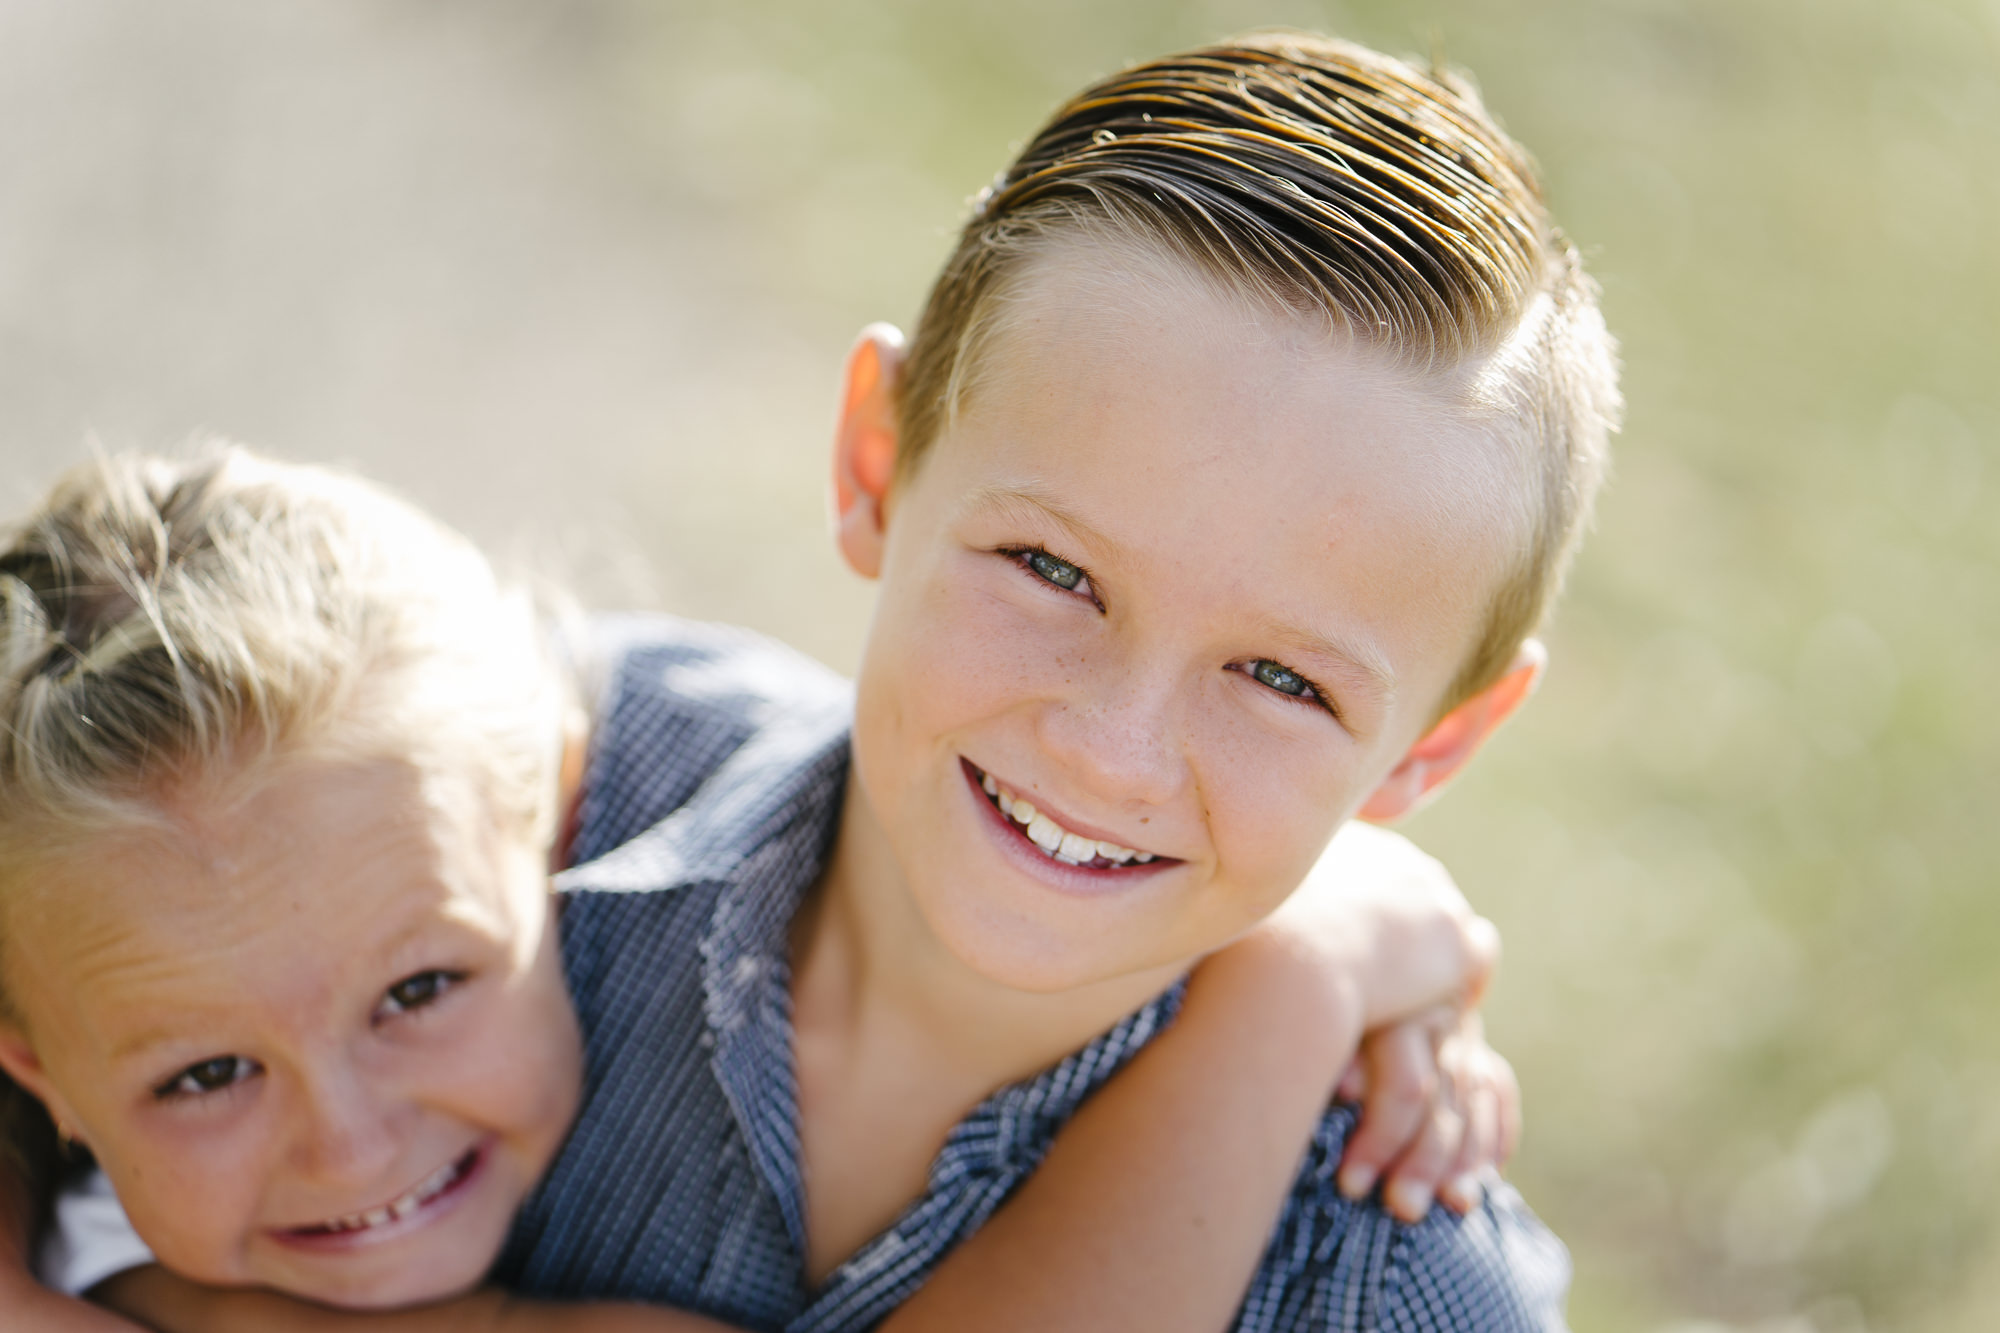
Large aperture example F/1.8
Shutter-Priority (S) or (Tv) – Good for sports and movement
This is the best mode for any photographer wanting to control movement in their photography. You would choose this mode if you were shooting a sporting event, heading out for some night photography. This mode is also great for photographing flowing water.
It allows you to control your shutter speed which is how fast your camera shutter opens and closes which in turn controls the amount of light that hits the sensor. The faster your shutter is, the less light it will let in, but it will also freeze faster action without as much motion blur. The lower the shutter speed, the more light it will let in which is perfect for night photography. It will also give you more motion blur – perfect for flowing water, or moving lights.
*Potential ‘Shutter’ priority issues
Keep in mind that you will not be able to control your aperture in ‘Shutter’ priority, so you may struggle with things like night landscapes where the camera will give you a large aperture (lower number f-stop) to try and give you more light meaning less of the scene will be in focus… and on the flip side if you’re wanting to photograph portraiture you won’t be able to control the amount of background blur being produced.
N.B. If you’re wanting to get motion blur in the daytime on water you’ll probably need an ND filter also to counteract the amount of light the camera is trying to let in (especially if you’re in full sun).
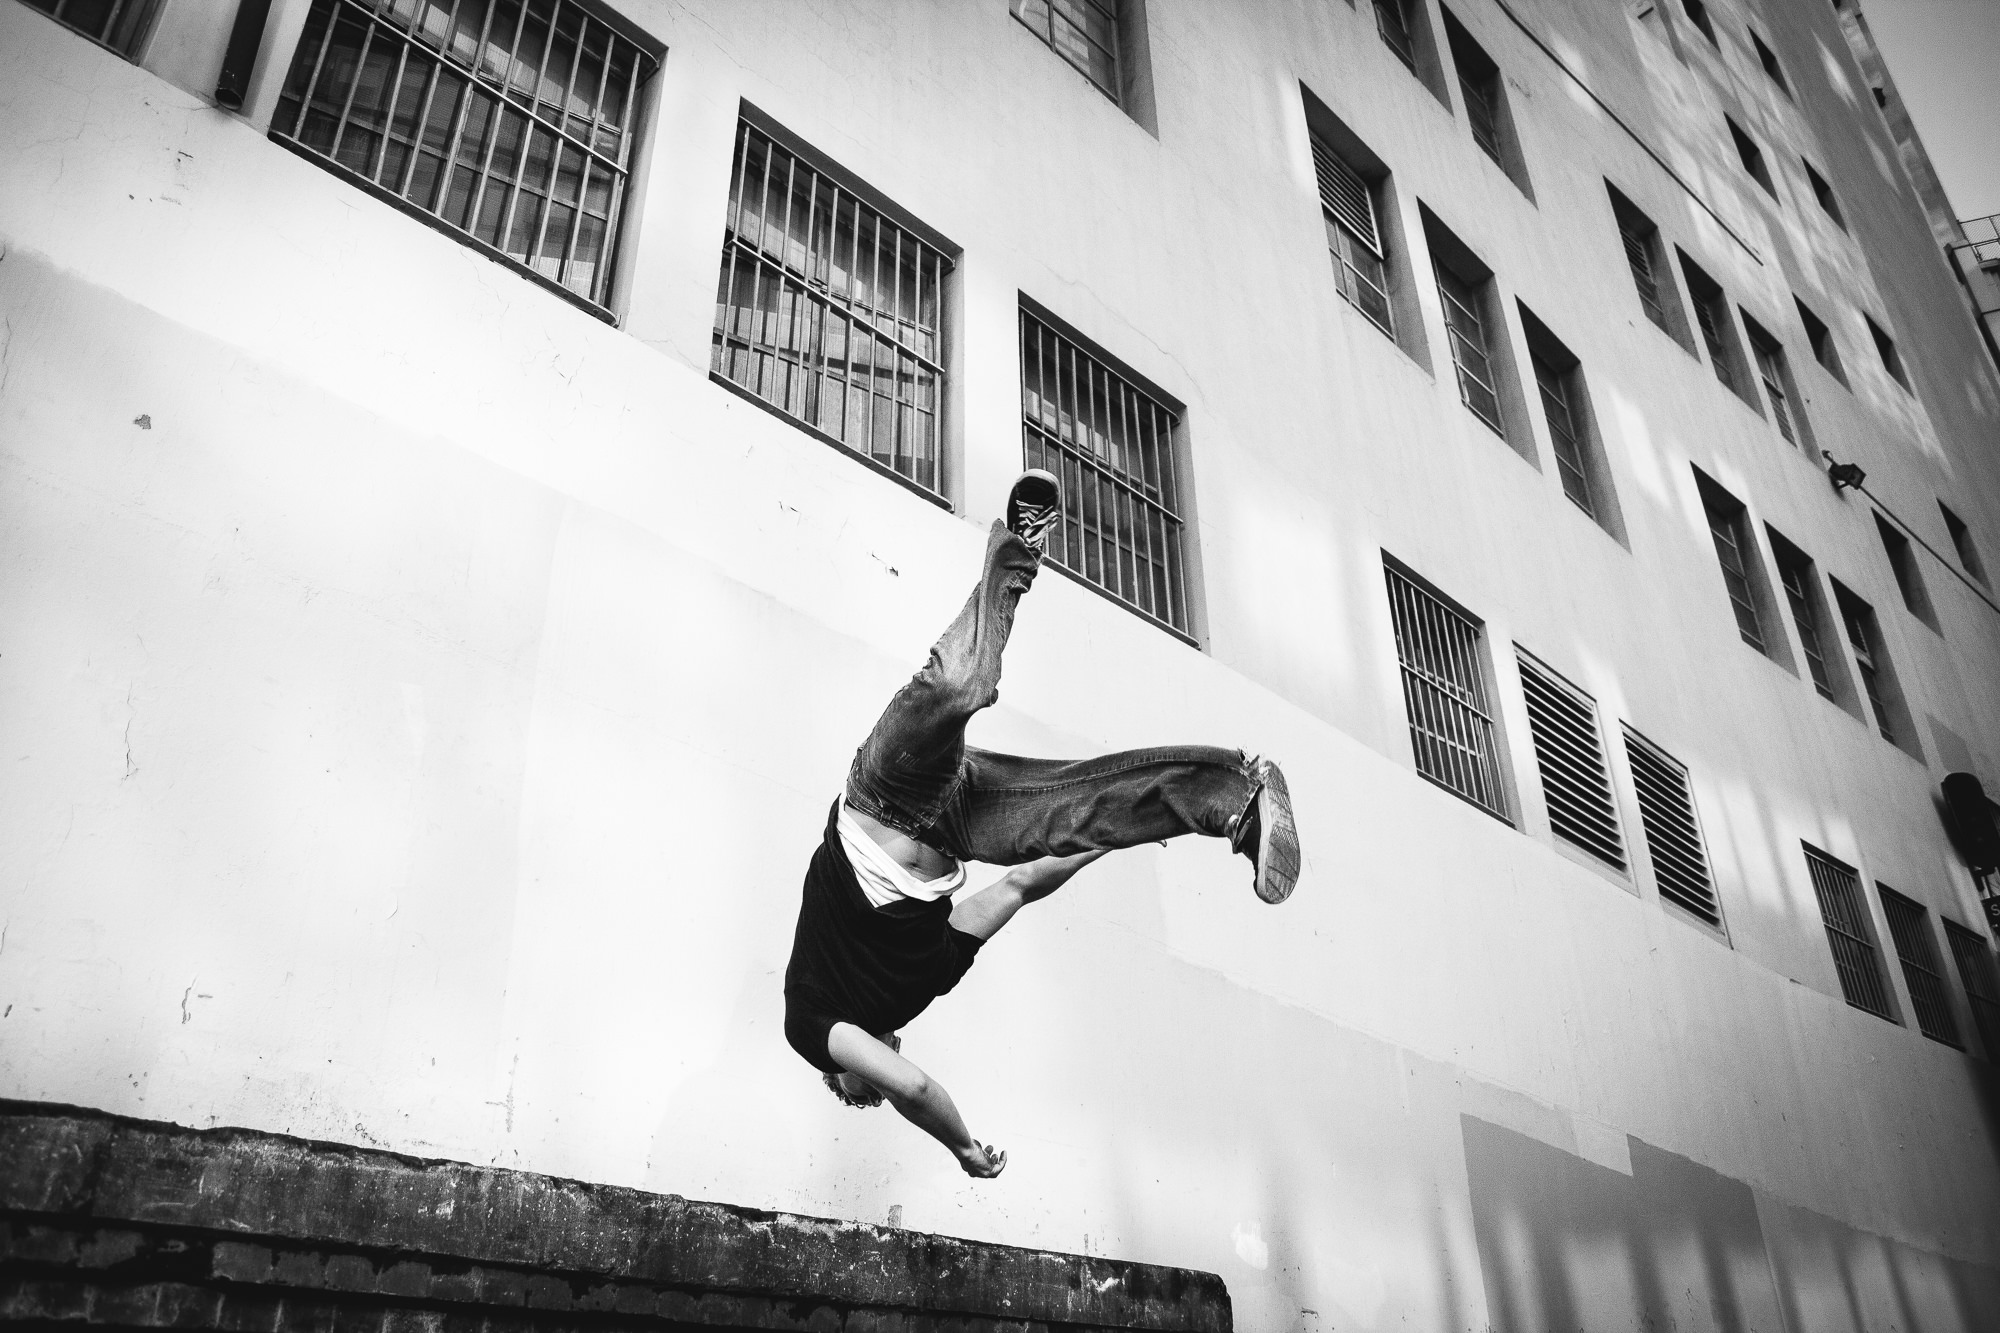
Fast shutter speed example 1/2500 sec
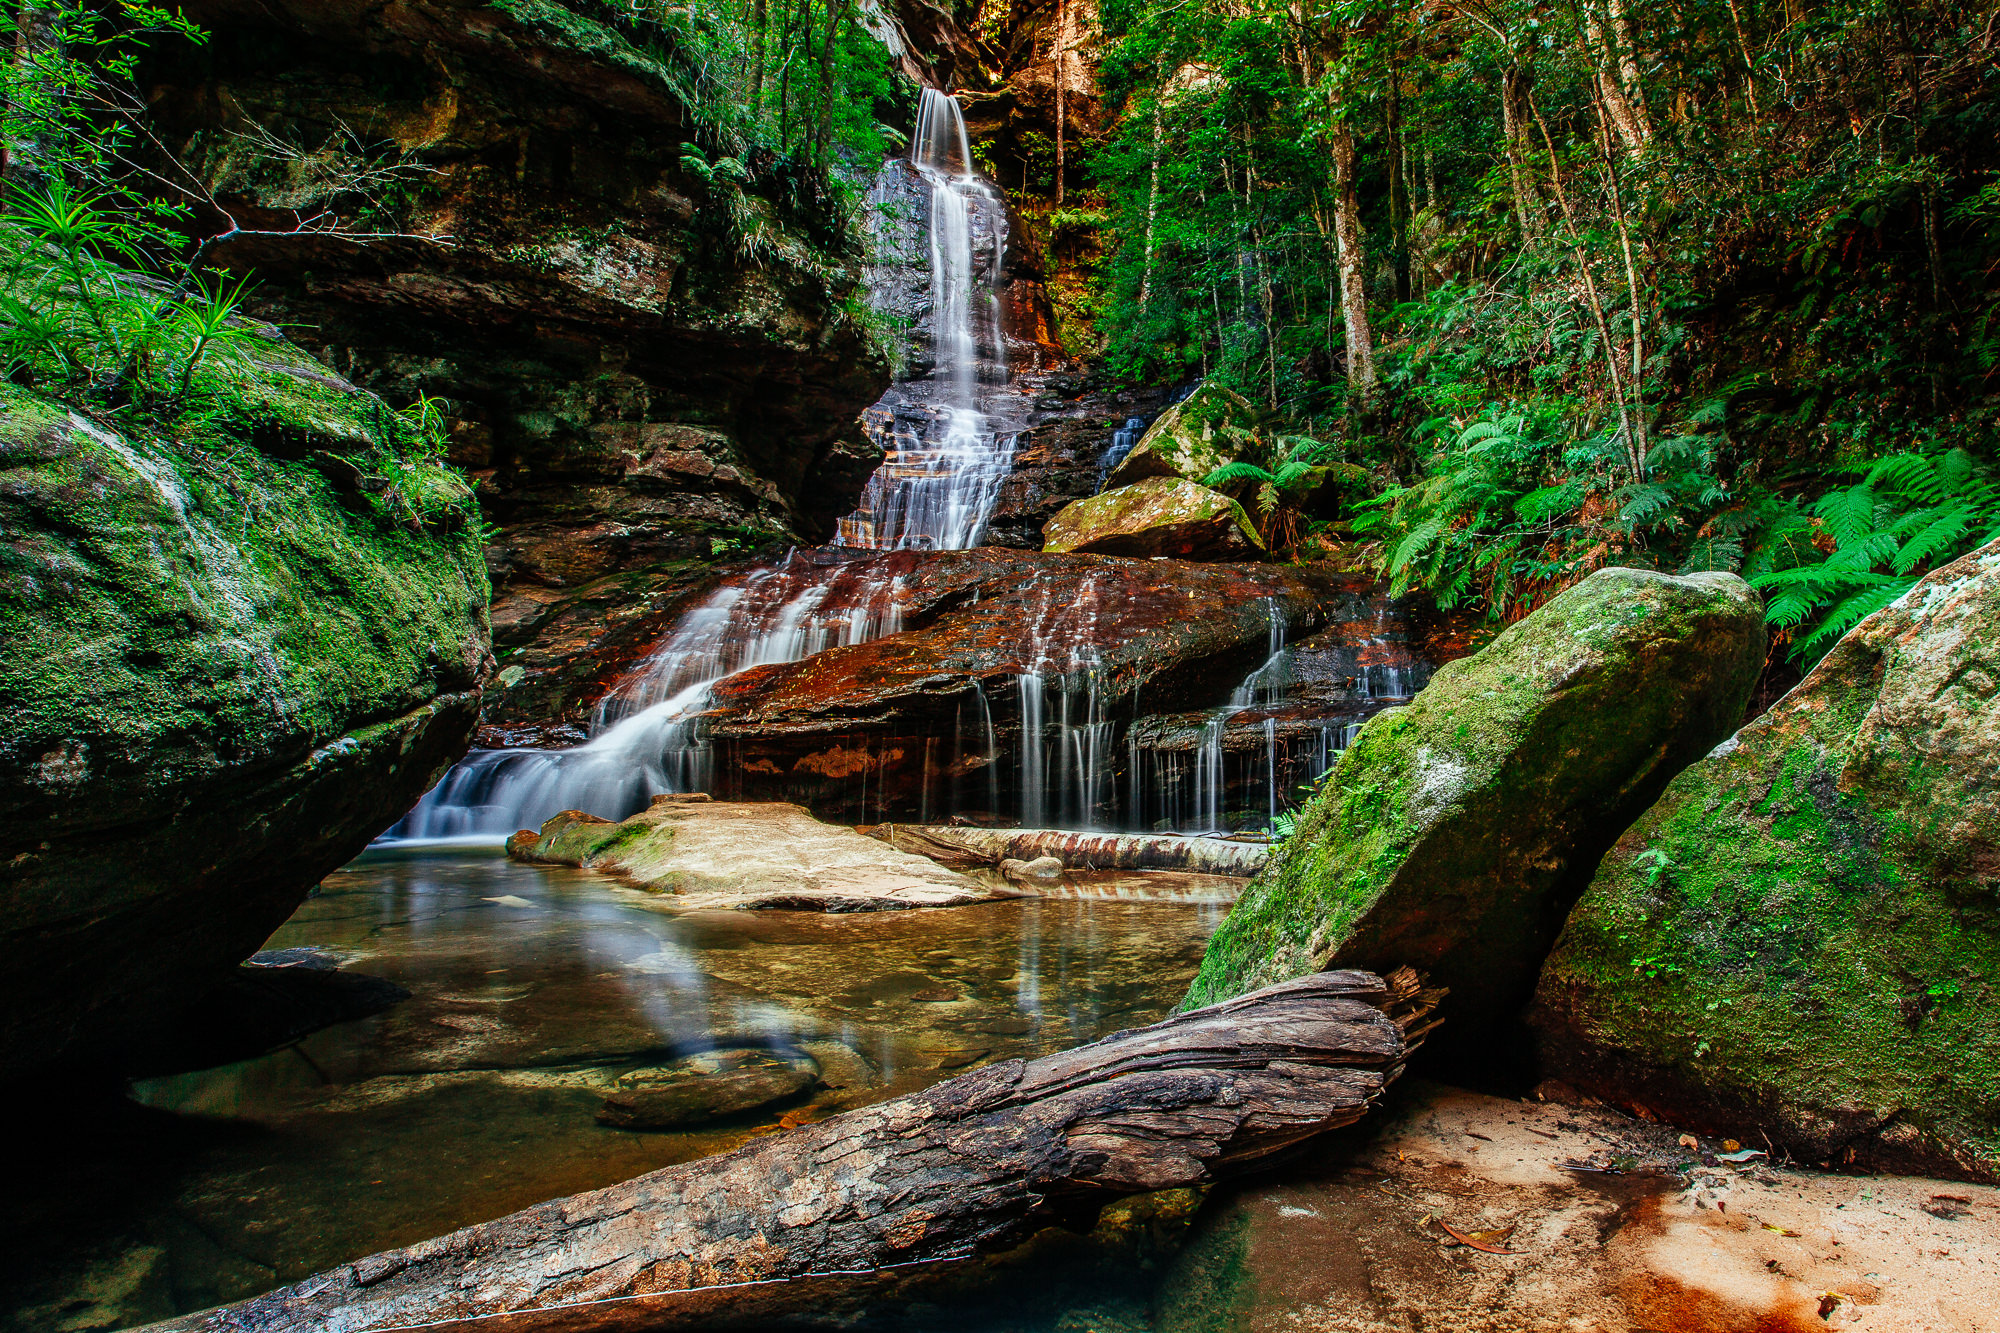
Slow shutter speed example 20 sec
Program Mode (P) – Look no hands!
Now if you are feeling a little lazy, or just wanting to get the shot without having to worry too much then this is the mode for you. It automatically selects the shutter speed and aperture based on the amount of light entering the lens, but still lets you tweak things like white balance or metering if you want.
In my opinion though you may as well use full auto instead, unless you are wanting to set the camera to spot metering allowing it expose for a particular area of your photo. Even though it makes your shooting experience easier it doesn’t do much in the way of honing your skills and the ultimate goal of these highly automatic modes is to get the shot in focus and exposed right by any means necessary… so if you’re wanting some nice expensive looking background blur, or beautiful frozen high speed action then you’re better off looking at one of the other modes mentioned.
If you just want to get the shot right and get it quick (point and shoot style) than ‘Program’ mode could be the way to go.
Manual mode (M) – The student becomes the master (or is just a control freak)
This is the best mode for people who want to become a better photographer faster and if you are specific about how you want your photos to look, but it’s not for the faint hearted.
I persisted and perfected this mode before I even investigated other modes (once I new what each setting affected) when I started out. First of all because my ego wanted to be able to say “I know how to shoot completely manual”, but also because I thought I might become lazy in my shooting before I’ve even learnt everything. My advice to anyone who is asking how they can learn to use the camera better is this:
“Never shoot in auto, because it will always just do what it needs to to get the shot in focused and exposed right, and you will pretty much be using an overpriced, glorified point and shoot… that’s really heavy and the photos will reflect that. Switch to manual and take shit photos until they start to look good.”
Pardon my french, but that’s how it will work. It will be frustrating, you will miss shots, photos will be over exposed, under exposed, blurry and noisy. You will however learn much faster… assuming you take your camera everywhere with you which I have another post on why you should be doing that here.
*Potential ‘Manual’ mode issues
If you don’t know your camera like the back of your hand, or your environment is constantly changing i.e. from cloudy to sunny, inside to outside it can slow you down fiddling with settings. You could also forget to adjust settings meaning missed shots. This is not as much of an issue if you use mirrorless, as the have an EVF (electronic view finder) which shows you the photo you’re getting before you take it… meaning you will see if it’s over exposed etc. Another reason why I love mirrorless – read more about that here
Creative Mode (CA) – Bonus mode for Canon users (perfect for beginners)
Welcome to the bonus round… If you’re lucky enough to be a beginner using Canon which I was lucky enough to be, they have a mode called Creative mode for beginners who aren’t across all the settings and how they effect what.
What it does is give you visuals and simple language in your ‘Q’ menu. Once you’ve switched to this mode and selected what colour mode you want it will give you options like ‘make background blurry/sharp’ and let you select whether you want to be able to take multiple photos with one press of the button, or just take a single photo with a button press. It is perfect if you pretty much know nothing about aperture/shutter/iso etc and still want to be able to control having a blurry background or not.
*Potential ‘Creative’ mode issues
It is very basic with very limited settings, so as a result there is only so much you can do with this mode.
Conclusion
Using these camera modes are very useful when you are in a situation where you need a particular result for the most part, but they are still auto settings which means they will become limiting at a certain point. This isn’t an issue if you aren’t needing to control everything, and perfect for situations like sports, or street photography when you need to be able to get the shot before the moment passes. Make sure though that you don’t let yourself get too comfortable in these semi auto camera modes until you have mastered your camera in manual, because once you do that you’ll be able to work with any camera mode in any situation and be confident that if you run in to trouble you’ll be able to get yourself out of it no problems.
Remember to sign up to the Photography Obsessed email list so you can be notified whenever new awesome tips are posted.


Leave a Comment